The studio setup, part 1d
First, create two null objects in the layout. Name the first "Array_handle" and the other "Array_target" by saving them in the objects panel.
Next reset all the motion and rotation parameters of the spot. Parent the spot to handle, and (surprise!) target it to target.
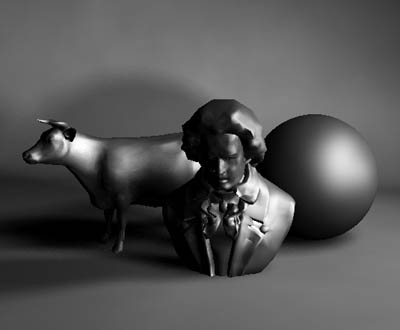
We will have four spotlights on our small array, so as we are satisfied with our luminosity level in the scene, we will just have to reduce the luminosity of the spot to 25%. Also, as there will be different placing with our spots, the shadows don't need to be as fuzzy - the four shadows will blend to each other. Set fuzziness to 15.
Now we are ready to clone our spot. The clones will share the same parameters, which is the reason we adjusted them before cloning - to avoid repetitive adjustments.
Now place the four spots to the following positions:
Spot1: -0.5m X, 0.5m Y, 0m ZNow the spots are in four corners of an imaginary flat 1 m box. Move it approximately to the same place where we had our area light and render:
Spot2: 0.5m X, 0.5m Y, 0m Z
Spot3: 0.5m X, -0.5m Y, 0m Z
Spot4: -0.5m X, -0.5m Y, 0m Z

IMO this looks much better than LW area lights - and with a render time of just 24 seconds. The highlights have a kind of squarish feel to them (Like they should if there was a square "butterfly" light diffuser), and the shadows graininess has reduced to acceptable level.
Talking about specularity... what if our object was really shiny? There will be four sharp highlights there, won't there?
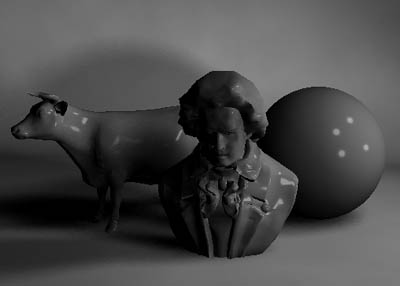
Yes.
Ok, does this mean that light arrays (Applies to spinning lights too) are unusable with shiny surfaces?
No.
Let's first look what a simple variation of D. Jerrard's Spinning lights does to the highlights: Rotate the array handle's bank 180° in frame 1, and set the motion graph's end behaviour to repeat.
As there are four lights in our array, each 90° apart from each other, and we use dithered low AA with the standard 50% motion blur we only need to rotate the handle 180° instead of 720° (90*2).
For this image I reduced the glossiness a bit (And also set shadow fuzziness to 5) but you can still easily see the circular highlights introduced by the spinning lights.
The spinning light trick needs motion blur to work, so it's not available at frame 0!
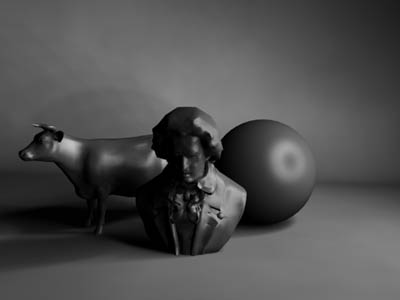
Also, the shadows look really smooth with this array/spinner hybrid - but now back to speculars: Delete the array handle keyframe at frame 1, and set AA off.
Let's think about the specular's true essence. What are they? I haven't verified this from any reliable source, but they look like reflections of the lights to me... did you already guess what happens next?
Right, we will model (Actually you don't have to, I already did ;-) a light diffuser. It's just our imaginary array box come true...
So, replace the array handle null with Array_handle.lwo. Set it unseen by camera, and turn all shadow casting options off.
(Lord I wish one would have this option in the real life ;-)
Give the object's surface some reflectivity (Well, 100%), turn on trace reflections and render:
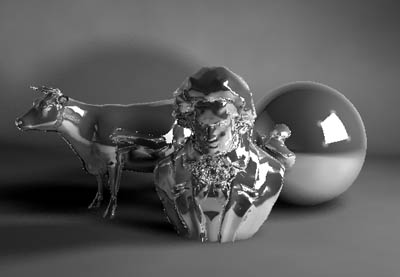
Wow! I managed to have the chrome cow here again! Though that was not what we wanted ;-)
Also, the small specular highs look funny at the edges of our diffuser. But don't worry, we will fix this all...
First, turn the studio.lwo and test_object.lwo unseen by rays. Then set the test-surface to 0% specular:
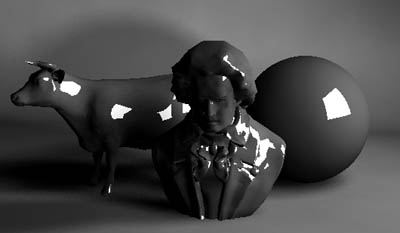
All right, here we are... the highlights are a bit strong, so let's turn down the reflectivity to 25%. Also, to get some glow around the highlights, let's turn the specular back to 75%, with low glossiness:
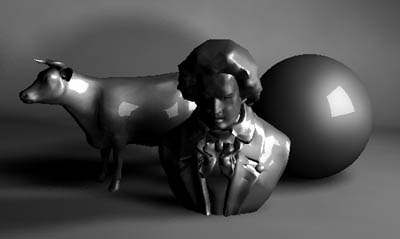
All right, this looks quite good... naturally you can have lots of different shaped diffusers, one of the more popular of them is the white umbrella many cameramen carry in their portable light kits. I included a quick and dirty model of an umbrella as array-handle2.
But Back to the dilemma we faced in the intro: How to shoot a chrome ball in the real life? As trivial this question seems, it applies to all reflective and shiny surfaces like cars etc.
The answer in it's simplicity is to hide everything you don't wish to show reflected in the image, and give the reflective object something decent to reflect. In the christmas ball case it meant taking the camera far away from the ball, carving an hole for the lens in a big styrofoam sheet, and bringing some very large sheets of styrofoam close to the ball, and lighting them, instead of the ball - and also putting sheets of styrofoam in between all the lights and the ball in order to avoid hot specular highlights.
Best solution would be building a white sphere for the studio, and having invisible light sources illuminating the walls;-)
Even though I promised to give the answer at the end of this tutorial, we are not quite finished yet...
This stage is included in the zip as Studio05.lws. Remember to load the surface for the test object - it's test surface 02. (Surfaces panel, load surface)

|
Product Info |
Ordering Info |
Support and Downloads |
Articles and Tutorials |
LightWave Mailing List Contest |
Mailing List Archives & Info |
LightWave Mailing List FAQ |
Other Interesting Web Sites |
