Walk Cycles for
Animals - Page 1
by: Timothy James Lundberg (
lundber6@pilot.msu.edu)
If you would like to work with the existing files for this tutorial, then download the scene, images, and object archives. Also, here is a preview movie of the animal's run loop.
On a project that I am currently working on, I needed to animate a walk and run cycle for two and four legged robots. The four legged robot was a "cat" robot that had to run in a realistic cycle. I looked on the web and did not find anything that could help me. I decided to use some old 2D cell animation techniques and transfer them into the 3D to get the realistic run cycle.
The first thing we need to do is model a 4 legged animal type robot (skip this part if your advanced enough to model and set up the hierarchy/I.K. for animating on your own). Since this is a robot and not an actual animal I'm not going to go into bones, there are plenty of tutorials for setting up bones in 2 legged models, just transfer the corresponding techniques for a 4 legged model. Since this tutorial is about animating and not modeling the model we're going to build is going to be very simple, if you want to build a cooler and more realistic model to animate then go ahead. The positions of the model are adjustable.
Start by opening Modeler and putting the grid on 100 mm. Select the Box too (shift x). I always try to model around the origin (x=0,y=0,z=0), so that the feet are aligned to the ground (XZ plane) it makes it a lot easier to set up I.K. and hierarchy later on. Hit "n" to bring up the numeric entry screen and create a Square with the values seen below.
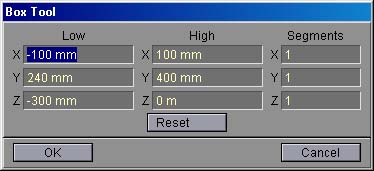
This is going to be the chest of our cat mech. Next we'll do the rest of the torso. Hit "n" again and use the below values using the numeric entry.
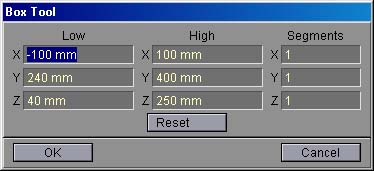
This is the Box that will be our hips. From here we're going to move onto the head and neck of the mech. For the Head make a box with the below values with the number entry.
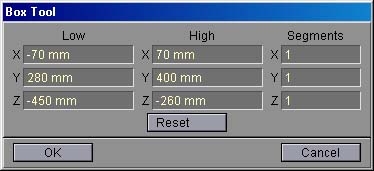
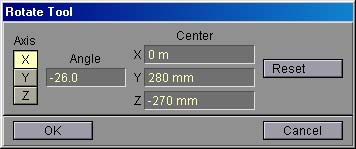
Select the Polygon Tool (ctrl h), select a polygon on the neck box then hit select all ( ] ). Then rotate it with the below values using the numeric entry option.
Now reselect the Box tool (shift x) and make the head with the following numeric values.
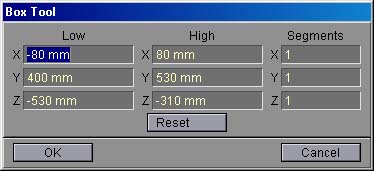
Ok, now the torso of the cat mech is done, from here we are going to do the legs. A few tips for modeling legs on a character, this goes if your doing a simple version like I am for this tutorial or a realistic model. Always model the legs with a bend in them, and make sure the bend is in the right direction. This is important when you are going to set up the I.K. and hierarchy in the legs, they tend to move a lot more realistically if the are set up with a natural bend. Now onto modeling our legs. First select a new layer and have the first layer visible in the background. Make sure that the box tool is selected and using the numeric entry, enter the following numbers.
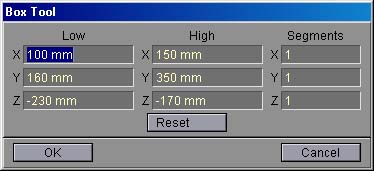
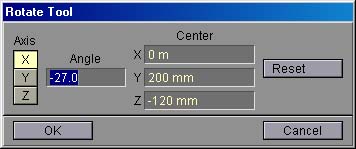
Now select the rotate tool ( y ), then bring up the numeric entry panel and enter the following values.
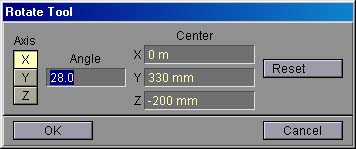
Select the box tool again (shift x) and use the following numeric values.
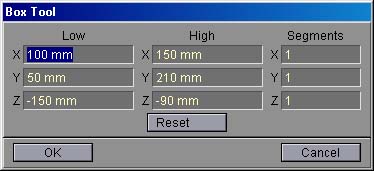
Now select the polygons of the lower leg and rotate it with the following numeric values.
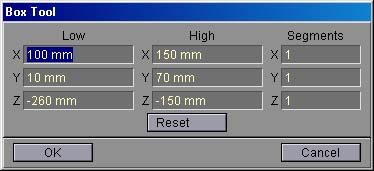
Lastly for the front leg, the foot.
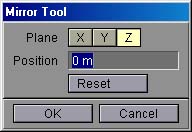
Now to quickly copy the legs. Select the mirror tool (shift V) and use the numeric values from the following picture. Make sure to copy over the Z axis.
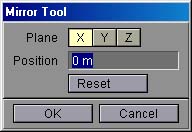
Now to copy again, use the following values, making sure that its copying over the X axis now.
Finally for modeling the back feet are not quite right, select them from the side view using the polygon selecting tool (ctrl h) with the select all function ( ] ). The back feet need to be moved forward a little bit so once they are selected hit "t" to select the move function. Then move them forward using the following numeric values.
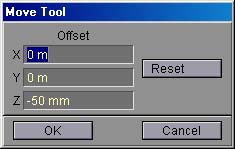
Give all of the feet a different surface name and color, this will help when we go to animating. Now we are done modeling, I told you this was going to be a very simple model. There are a couple of advantages to doing a model like this though. One, no matter how weak or powerful your machine is this will animate and preview extremely fast. Two, once the motion paths are to your liking, you can save them and apply them to a much better looking model, or just parent new parts to the low poly count model. This is always a good way to do animation. Ok now we need to save the individual parts of the model out since this is going to be a segmented model. Start selecting individual parts, I.E. head, chest, left front foot, and saving them to a folder. An easy way to separate them out is to cut (x) and paste (v) them to an individual layer. Make shure to use names that are specific, like Left Front Shin or Right Rear Thigh, this makes setting up the I.K. ten times easier. Also I always name the parts of the body as if the model was talking about his left arm, or foot, not how I see his body parts from a 3rd person perspective. Once you have all the body parts separated and saved, quit modeler and open Layout.
Go To Page 2

